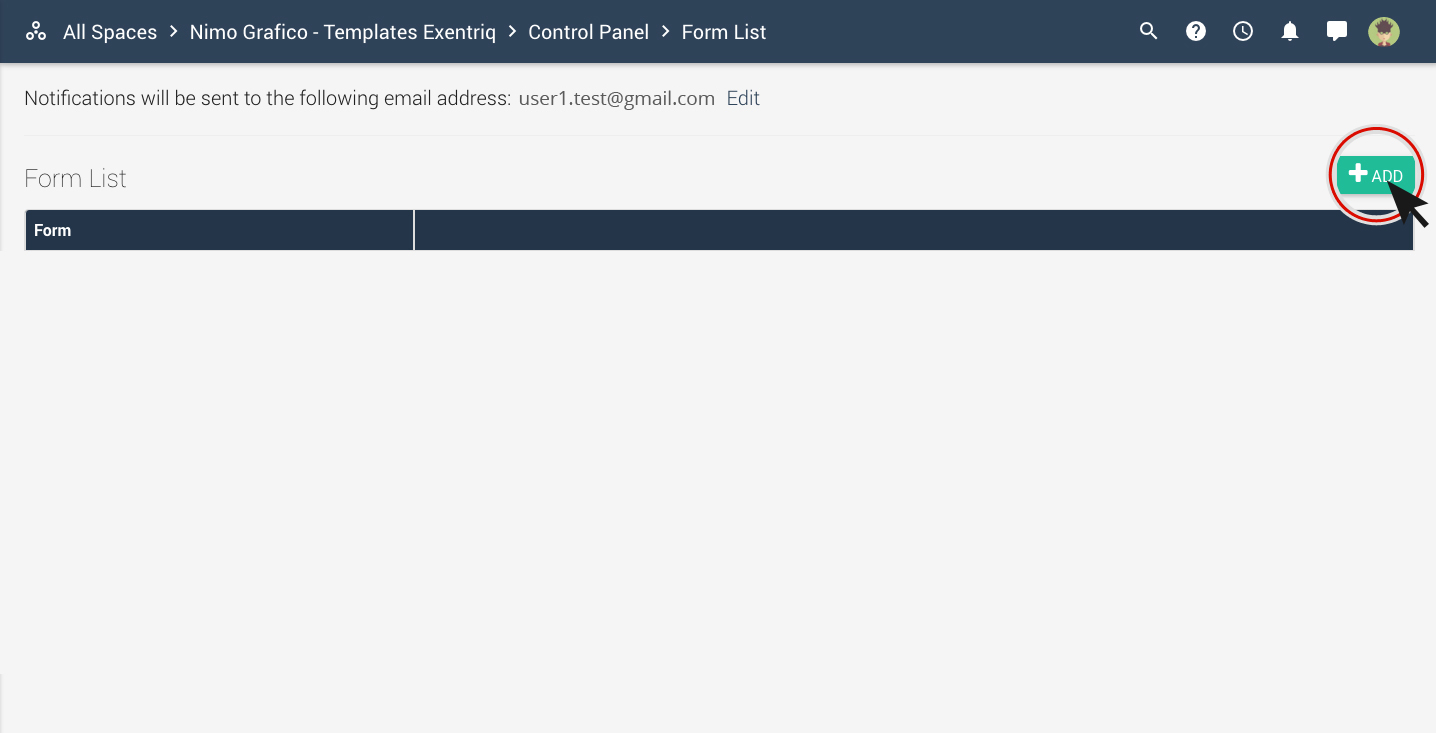
Create & customize form
Step 1
-
Click on "Form" button.

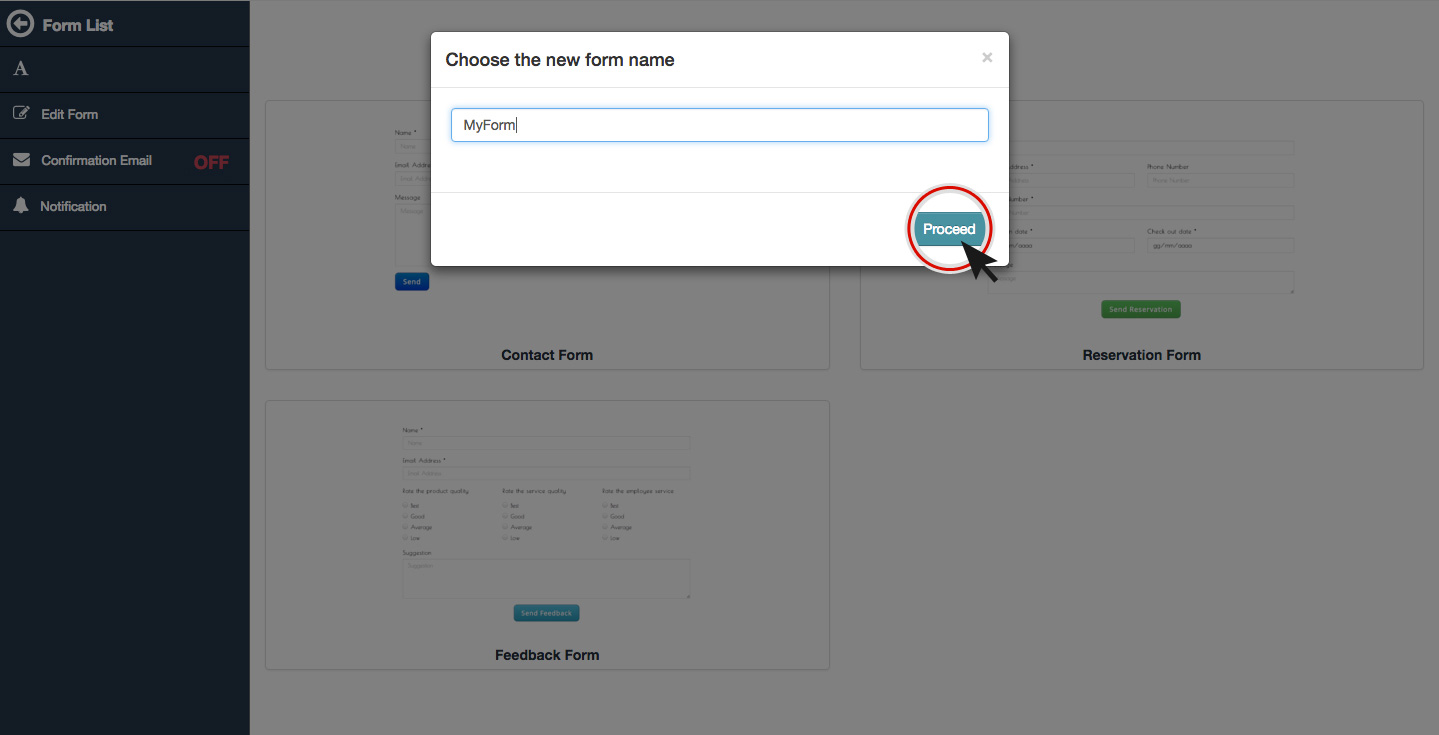
Step 2
-
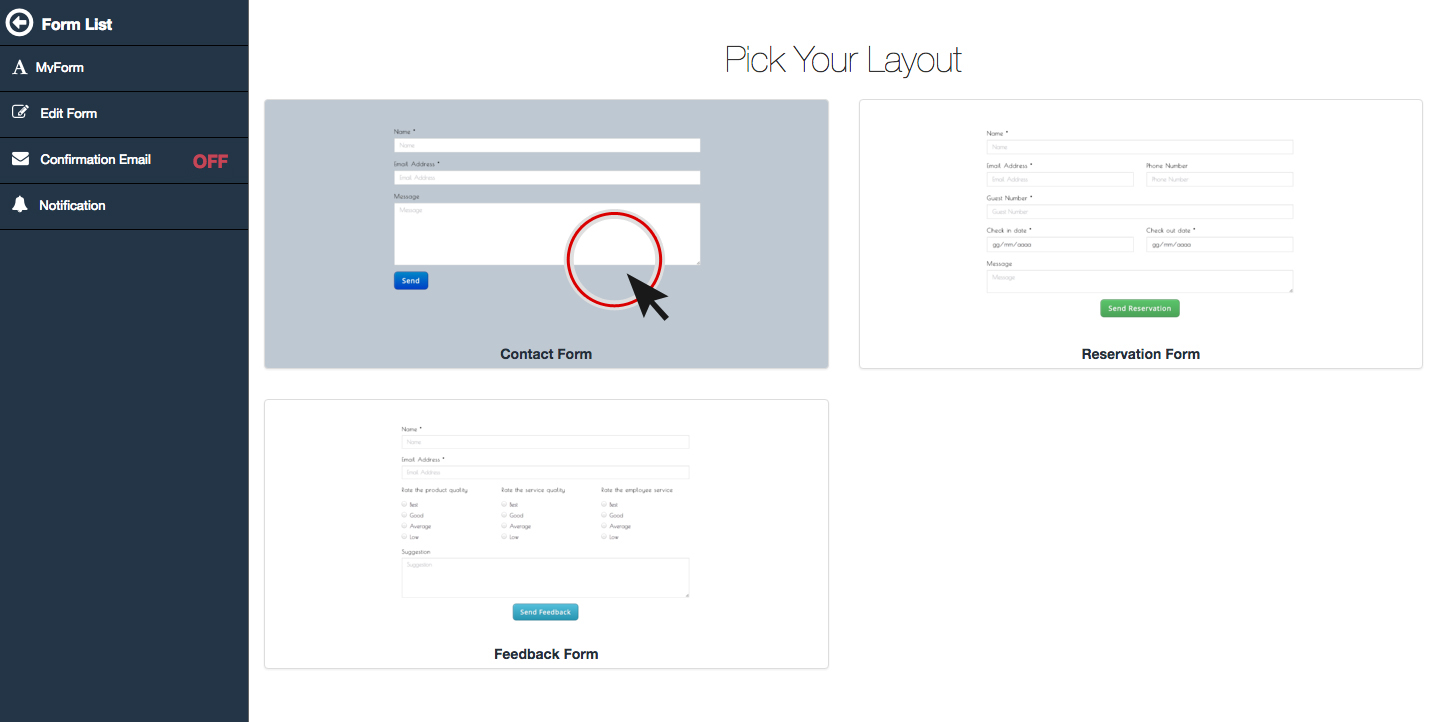
Click on "add" button to create a Form,
insert name and choose a layout.
Step 3
-
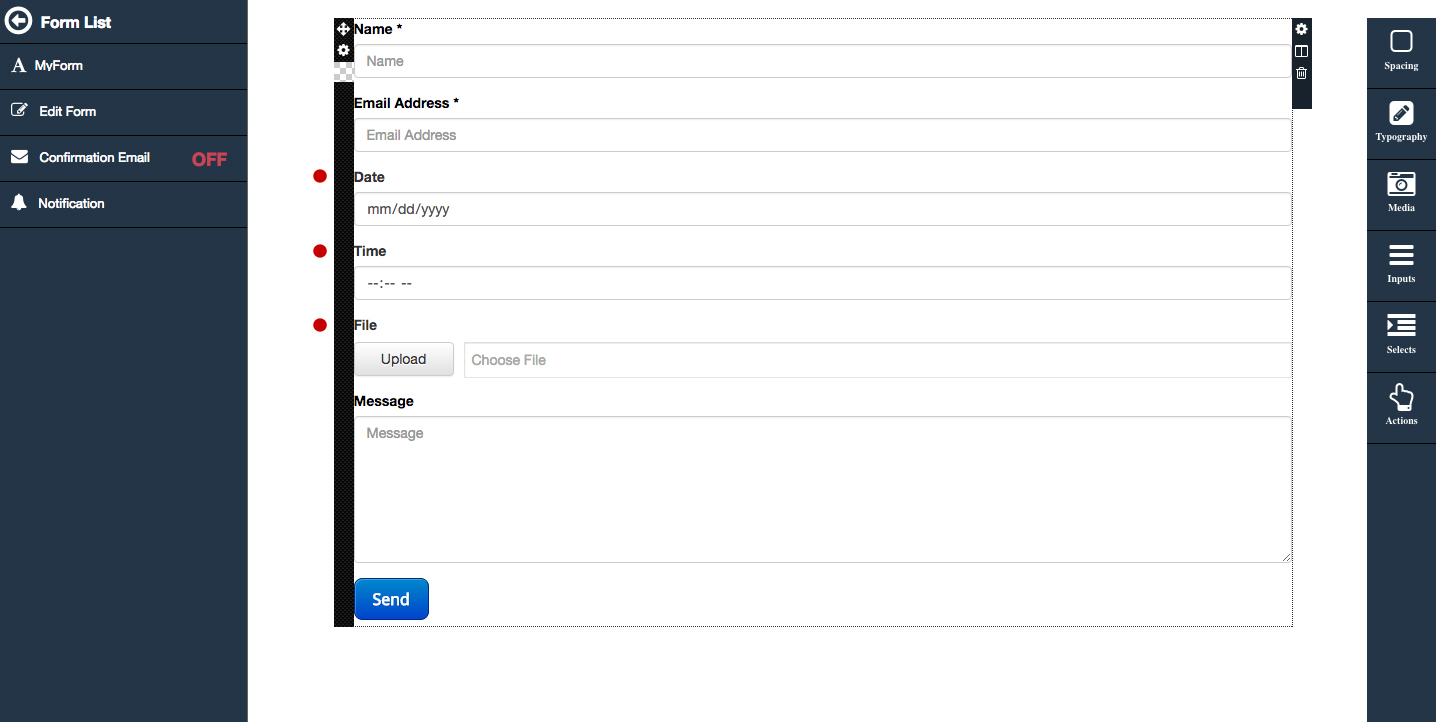
Now you can customize your form.
On the left side bar, you can edit a form name, edit layout (view right side bar) and activate the confirmation email.
On the right side bar you can edit the layout form:
- Insert a spacing or a line.
- Insert type elements like title, subtitle or paragraph.
- Media (image or flash object).
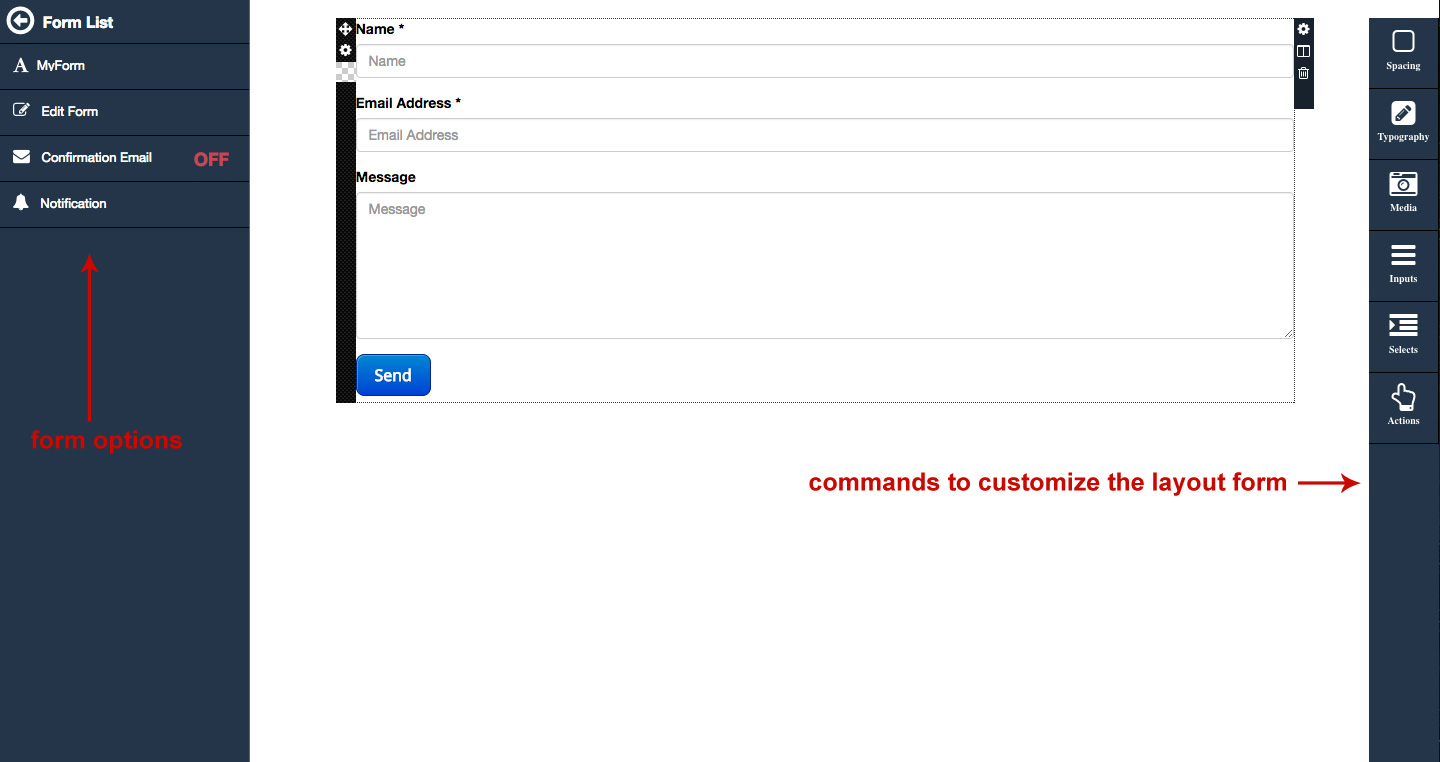
Inputs & selected elements.

with input elements you can add on layout:
- Text
- Email
- Date
- Time
- Text area
- File
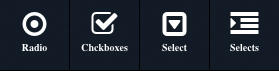
with selected elements you can add on layout:
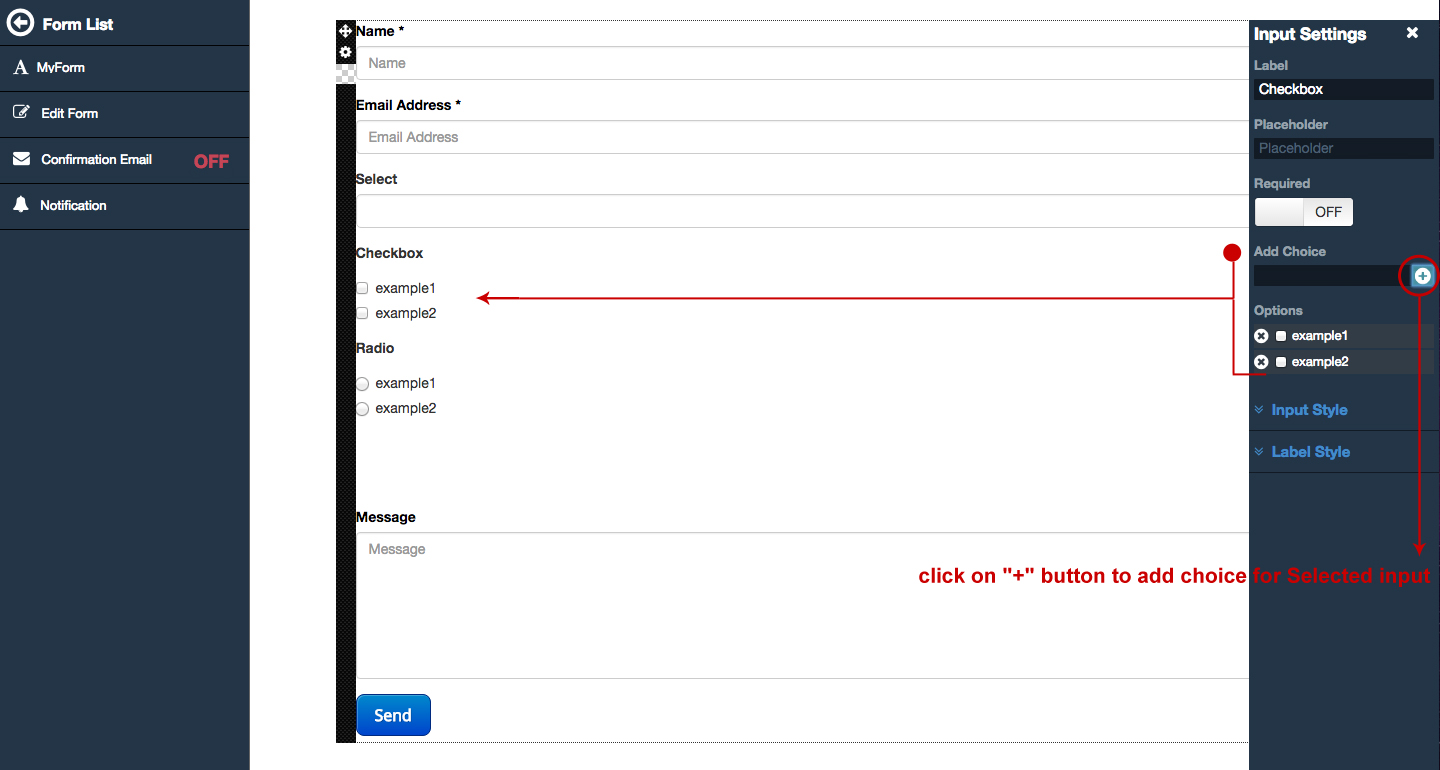
- Selected
- Check Box
- Radio Box

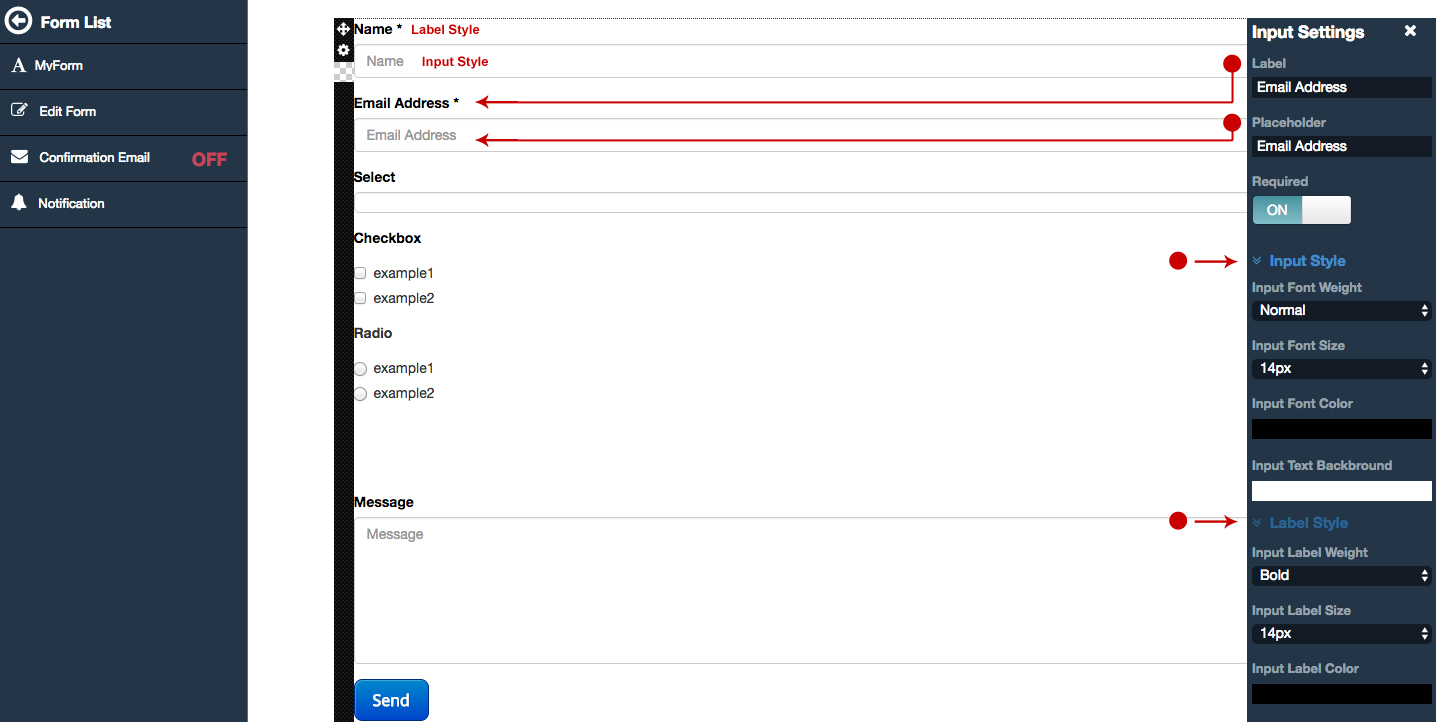
Double clicking on the elements
to open the right window for the setting.
On input settings you can choose input & label style (fonts, colors, sizes)
If you press the required button fill in is required.
On selected settings you can choose Input & Label Style (fonts, colors, sizes) as for setting the selected input, with in addition the possibility to add selected options by check / radio.
If you press the required button fill in is required.
Action Button.
With the step button you can create a form with multiple pages.